
Building a European Inspired Potager Garden

I woke up one morning with a crazy idea. I was going to build a garden. It was a "she believed she could, so she did" moment. I got out my graph paper and starting my journey, not really knowing what was ahead. Ahh, ignorance is bliss.

She believed she could, so she did (with her husband's help)
It all started with a problem area at our house after home construction, and three years later, a pool. We couldn't grow grass in this spot, and the drainage wasn't optimal. But it was a relatively flat area, with full sun, and it looked like a good opportunity for "something". Now that most of our yard is fenced in because of the pool, we now have an area, free of deer, that was calling out to me; "make me a potager!" And that we did.

Le Petit Potager, New Dawn Roses
INSPIRATION
I would be remiss to leave this part out. It is important to me to be inspired by things that can push me. I need a goal; one that seems borderline unattainable so I can dig deep and find a way to get there. The first inspiration comes from gardening with my mom as a little girl. She taught me much of what I know about flowers, perennials, and potted arrangements. The second inspiration comes from my great grandfathers English Garden, shown below. Check out the roses seemingly hanging from the sky on wire!


FIND THE AREA
The first order of business, if you are looking to build any kind of garden, is to find the right area for what you want to create. If you have an area of full sun, it is wise to choose plants that thrive in that environment, such as roses and vegetable. Being that our area is full sun, a vegetable garden made sense to me, as did a cutting garden. This would allow us to harvest vegetables while also enjoying flowers, all being close to the house. A potager garden is preferably constructed on flat land.

Flat space, near the house. Perfect for a potager
MAP
After we navigated our way through "where" and "what", we mapped out the potager. We did this first on graph paper, and then outside with stakes and string. A true potager garden has symmetrical lines, while imposing order on nature. Depending on your goals, you can take this as far, or not as far, as you want to. Our garden is symmetrical from every angle (within a few centimeters). And boy, did it take work to get there.

Hooks and String, all measured out
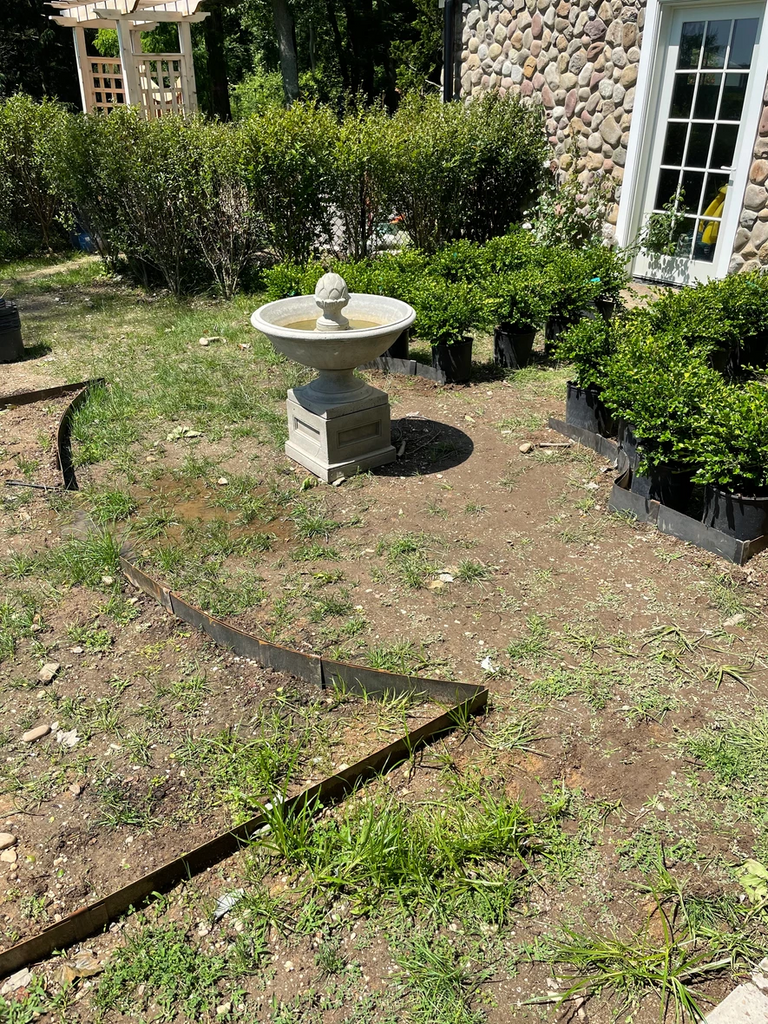
FIND YOUR FOCAL POINT
The first order of business was to find our focal point, something that would sit in the center of the garden and be the jumping off point for how everything would fall into place. We went to our local garden center because the delays on getting one shipped were too long. The one we chose had a square base but a round water basin, which allowed me to play with the lines of the potager however I wanted. We placed our fountain in the center of our area. And worked our way around it.

Artichoke Fountain, we used an ext cord under the gravel
EDGING
We used industrial grade 6" metal edging. This was very 'extra' of us and it was truly hard to work with because it wasn't easy to bend and form. If you are looking to edge a square or rectangle space-this is no problem! But for us, we had some issues. Not only did we have to dig down into rocky soil to get the edging into the ground, but we had to connect each piece and even bend some-praying they line up. If you would like to go the metal edging route, be prepared to spend a few hundred dollars. However, there are many styles of edging suitable for all designs and budgets. At the end of the day, our potager included metal edging, repurposed brick edging (found for free on a local Facebook group), and also river rock edging around our roses.
Alternatives to our 6" metal edging;
4" metal edging (cheaper that 6" and potentially easier to bend/control)
Rubber edging
Plastic edging
Repurposed rocks or bricks

EdgeRight 6" metal edging

EdgeRight connectors, both flat and corner pieces


Dug out some areas to lay repurposed brick, EASY!
PEA GRAVEL PATHWAYS
After the edging was in the ground we rolled out the landscape fabric and laid down the pea gravel. We should have stapled down the landscape fabric at this time but ended up getting too excited and later had to go back and do it. Do not skip the fabric OR the staples. The fabric prevents weeds in a major way, even though at some point we'll have to zap a few with RoundUp. And the staples will prevent shifting that happens naturally with any kind of traffic. See my recent pea gravel blog post for all of my tips regarding pea gravel.

Laying the gravel over landscape fabric-use staples!
PERIMETER PLANTING
We chose Winter Gem Boxwoods to line the perimeter of the garden. We dug a trench just on the inside of of the edging and planted the boxwoods with amended soil. We left a little bit of space in between each to give them room to grow into each other. We got trapped in a few spots because of underground sprinkler lines but I think it will work out fine by next year.


Adding amended soil
COMPANION PLANTING
This deserves it's own post one day. One of my goals was to establish companion planting within the quadrants. This would allow flowers and vegetables to live in harmony together and help each other out. For example, I planted marigolds near the tomatoes because the scent of marigolds help deter pests that like to eat tomatoes. I also planted a Butterfly Bush near Bee Balm and Coneflowers, as they are all good buddies! Other good buddies that I planted together are lavender and basil (which will help prevent Aphids) and lettuce with beans! This took a lot of research as I have over 25 varieties of flowers and vegetables, and they were all planted with intent. The good news is that the vegetables are thriving and already ready for harvesting!


POLLINATORS
It was really important to me to have a garden that could serve my family but also be helpful to the environment. Having pollinators in the potager is my attempt to reverse the decline of bees and provide food for butterflies. In order to do this I planted; Hummingbird Mint, Bee Balm, Coneflowers, Zinnias, Dwarf Butterfly Bushes, Black Eyed Susans, and Hollyhocks. I also added a Hummingbird feeder.


COST
For transparency, I thought I would break down the cost of this project for my readers, as I am hearing many of you might be interested in doing this. I decided to do this predominantly to share with you that...we can do hard things, which in turn can save a lot of money. But we must be confident in our skills, and use help where it's needed. I am very sure that hiring a landscape designer and a master horticulturist would have cost us $30k to professionally install this potager. And that is likely because this was a tough project, worth every penny of $30k in terms of research and labor. Here is my breakdown;
Prep
Stakes and string $35
Edging
Metal Edging 6" $1200 "EdgeRight" via Amazon
Brick Edging $0 free on Marketplace
Plantings
Boxwoods (64) $30 each
Interior Flowers and Vegetables approx $400
Gravel
Pea ravel and delivery with our wonderful landscaper $300
Fabric $40
Staples for fabric $15
Amended Soil $30/yard
Focal Point
Fountain $750 (alternatively you could do a big pot with annual flowers!)
Delivery of fountain (we saved $100 by doing this ourselves, it was unforgettable LOL)
Installation, approx 48 straight hours in total- 2 1/2 months
24 hours of edging and boxwood planting of all 4 quadrants
3 hours of pea gravel work between fabric, staples, and leveling the ground
1 hour of brick laying
2 hours of ground leveling
1 hour of fountain installation
8 hours of planting flowers and vegetables
6 hours of research, mapping out, designing
3 hours of tinkering to get things right (raking, stapling down cord for fountain, rose pruning on the back wall..)

I am so happy with the way the garden turned out. It was everything I dreamed of, and even more. It is ornamental, productive, and delicious. I am so proud that my husband and I took on this challenge, and I am even prouder that not only did we start the job...but we finished it as well! If you are willing to put in the work, I can assure you this is a very satisfying project that can be enjoyed for a long time. Decorating our exteriors is just as important as the interiors. And bonus, I believe this potager looks as good as it tastes. Bon Apetit!
Thank you for reading! xx -Chrissie
Comments on this post (1)
Beautiful! Just discovered “potager”, and it’s what I have always called a formal garden, and never found plans. Thank you!
— Elizabeth Kantner