
One Room Challenge, Week 7, Lattice

Eureka! The lattice is up. And I am so excited to share it with you, while hoping not to reveal too much before the final, final. Along with sharing the process with you, I also want to share an important message, which I think is more important than the lattice itself.
When I started the One Room Challenge in the Fall of 2020, I told myself I wanted to do some things on my own and my husband thought I was nuts. Because I didn't have the time and some things were better left to the professionals (wait, I'm not a professional? j/k). Fast forward, I did a lot of it on my own and felt so proud. For this challenge, I wanted to do the lattice work myself, because I knew I could. Determination was all I needed, and I had it. This time around my husband convinced me to hire out to get all the cuts just right, and so I could focus on my interior design clients. It felt like a stomach punch to have someone else do this project because I thought I wouldn't feel as proud. But you know what, I love how it came out and I have to move on. The pressures of social media has us feeling like we either have to spend a lot of money to get things looking magazine worthy OR we have to suck it up and do it ourselves when maybe our time is better spent elsewhere. I decided my time was better spent elsewhere...with my clients and their projects. And I am here to tell you that whatever you decide to do with your time-have it mean something in the end. And do not feel guilty! If a DIY is over your head, don't drown yourself in it.
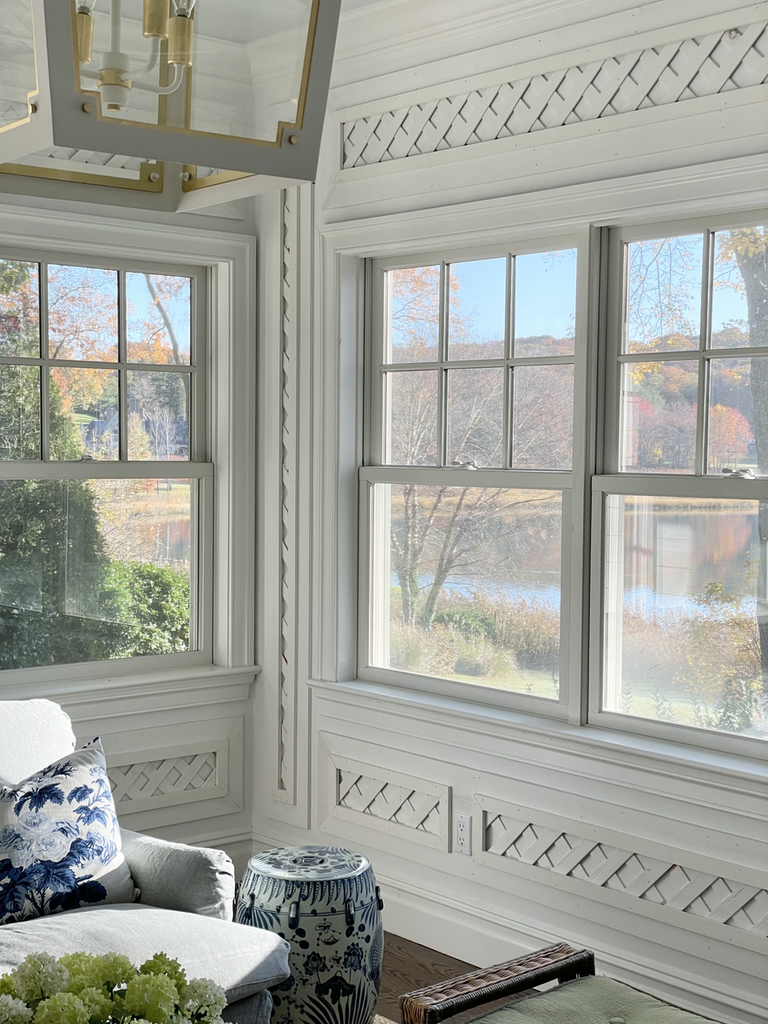
Phew, now on to the lattice. I ended up purchasing a better quality cedar lattice because I didn't want to skimp on the quality. It turns out that it took the paint much better and looked exactly how I wanted it. Moral of the story is if you want some temporary fun in a small space, while saving money, get your lattice at Home Depot. They even have a white vinyl option. If you are committed to a design in a space that you frequent, consider purchasing good quality lattice or finding online options.

The first step was measuring out the boxes that the lattice would go into. This required some framing around the outlets and getting a little creative around the Nest system we have. We used 3.5" x .5" of wood to surround the lattice.

After the boxes were built the lattice was cut to fit inside. So each piece ended up being custom because none of the boxes are the same. This allowed me to really choose which lattice pieces looked the best and which ones made the cut for the room.

After the lattice was nailed into the wall, smaller trim pieces were used to cover the edges of the lattice. This created a final, clean look, with no loose ends.

We painted the lattice in a semi gloss so it pops against the flat wall paint. However, after all the trim work, we still have to go back and do touch ups over the nail holes. And still have to get the textiles in order. Ahh, tick tock!

Thank you for reading and I hope you have enjoyed this process so far. More to come with the final reveal, and as always, please check out what the others are up to by clicking here!

Leave a comment